Using the Rocks Tool
Your definitive guide to Ninety's Rocks tool and how you can use it document and manage your quarterly goals.

Written by Tommy Mains
Updated at April 22nd, 2025
-
 Insights
-
 Data
Data
-
 Rocks
Rocks
-
 To-Dos
-
 Issues
-
 Meetings
-
 Headlines
-
 Vision
-
 Org Chart
-
 1-on-1
-
 Directory
-
 Knowledge Portal
-
 Assessments
-
 Integrations
-
 Account Options and Troubleshooting
-
 Mobile
-
 Partner Hub
-
 Maz
Maz
Table of Contents
Using the Rocks Tool
All team members (even Observers) can access the Rocks tool to view all their team's quarterly goals and priorities. Most weekly meeting agendas include reviewing Rocks as part of their agenda. The team holding the meeting will see their team's Rocks page during that segment.
Reviewing Your Team's Quarterly Vision

At the top of the Rock's page is a dropdown you can click to review your team's Vision for the quarter, including:
- The Future Date — the day the quarter ends
- Revenue goal for the quarter
- Profit goal for the quarter
- The most important KPIs for the quarter.
Users with Manager or higher-level permissions can edit these fields directly in the Rocks tool by clicking the pencil icon inside the dropdown. To save your changes, click the checkmark that appears in place of the pencil icon.
Navigating the Rocks Page
Navigating the Rocks Page
Team Dropdown
Status Indicator
Use the Status dropdown to filter the team's Rocks by one of the following status indicators:
- All: Includes Rocks with any of the possible statuses.
- Off-track: The Rock is still being worked on, but progress has fallen behind schedule. For example, Milestones are consistently completed late, or the scope of work remaining makes the original due date unlikely. Use this status to signal during meetings that the Rock needs attention or support.
- On-track: The Rock is actively being worked on and progress is on schedule for completion by the due date.
- Complete: The Rock has been finished and meets the criteria for success as defined in its description or SMART framework.
- Canceled: The Rock was started or planned but has been intentionally dropped before completion. This typically happens when a Rock is no longer relevant, priorities shift midquarter, or the team determines the work isn't necessary. Use Canceled instead of deleting a Rock when you want to preserve a record that the goal was under consideration during the quarter.
Archive Toggle
Click the Archive Toggle on to view your team's archived Rocks. Click it again to return to the present quarter.
Search Bar
Use the search bar to quickly find Rocks.
Rocks Page Organization
The Rocks page is divided into several cards. The first card shows the Rocks designated as Departmental Rocks (Company Rocks for the leadership team) — the Rocks your team has determined are the most important to accomplish this quarter.
Each subsequent card is for the individual users on the selected team.
Each card shows the following information:
- Current status
- Rock title
- Milestone progress bar
- Due date
Viewing Milestones

You can click the caret on the far left of any Rock's row to view its Milestones.
Reorganizing Rocks

Hover your cursor over one of your team's Rocks to show a six-dot icon on the far left of its row. Click and hold this icon to drag the Rock into your preferred order.
Viewing Specific Users — How to Hide Users from the Rocks List Who Do Not Have Any Rocks

Users with Manager or higher permissions can adjust the order in which users are presented on their team's Rocks list page. After the Departmental Rocks section, each team member's Rocks window has carets on the top right corner that you can use to adjust the order shown.
The default order is alphabetical by each team member's first name. After adjusting the order, your preferences will remain in effect until you clear the cache in your browser.
Upon the release of the Planning Board, teams will have access to additional filters for the Rocks tool, including an Owner filter, which allows you to select specific users to view at a time.
Creating Rocks
How to Create Rocks
Documenting your Rocks in Ninety gives your organization a centralized platform to record its progress, quarter after quarter. Most teams identify Rock candidates during Quarterly Team Meetings and refine their scope during the first couple of weeks of the quarter.
Tip: Use our Insights tool to track Rock and Milestone progress.
What Are Rocks?
Rocks are quarterly goals that help teams progress toward their organization's annual goals and vision for the future. These are significant objectives outside the scope of daily work, such as launching a new project, improving a process, or achieving a milestone within a larger initiative.
Creating Rocks in Ninety
There are three ways to create a new Rock in Ninety:
- Using the global Create button
- From your team's page in the Rocks tool
- As a Linked Rock from another item
Using the Create Button

View a step-by-step tutorial
Creating in the Rocks Tool

To create a new Rock from your team's page in the Rocks tool:
- Click Rocks from the left navigation.
- Click + Add Rock on a user's card.
- Write the Rock's title and press Enter or click the checkmark.
- Click on the Rock's row to open its details panel to edit its content.
- Use the details panel to:
- Assign an accountable person
- Add a description
- Create Miletsontes
- Add attachments and comments
View a step-by-step tutorial
Creating Linked Rocks
Linked Rocks show the item(s) it's linked to in the Linked Items section of its details card.
You can create a linked Rock from an existing item in Ninety (such as a Rock, To-Do, Issue, or Headline) during a meeting or by navigating to the corresponding tool from the left navigation.
To link an existing item to a new Rock: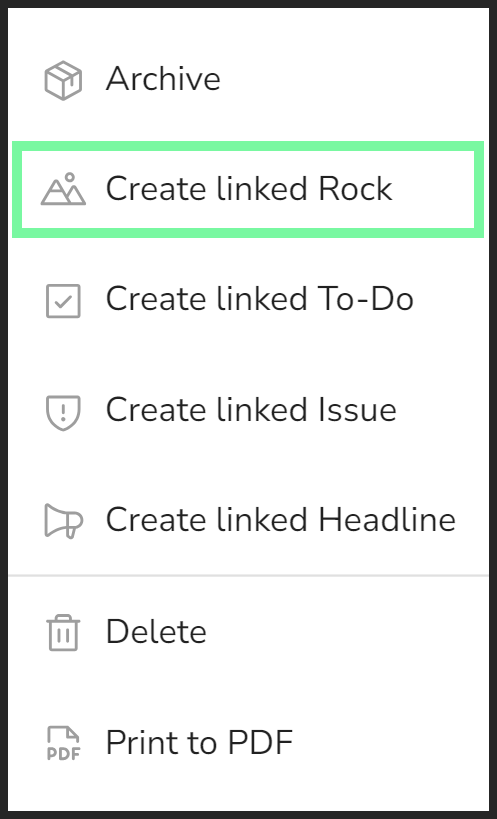
- Right-click the item's row.
- Click Create Linked Rock from the dropdown.
- Edit details as desired from the popup.
- The assigned due date will be 90 days out.
- The title and description start the same as the initial item's.
- Click the Create Linked Rock button.
To unlink an item from a Rock, the user assigned to the Rock should:
- Click Rocks from the left navigation.
- Click the Rock to open its details panel.
- Scroll down to the Linked Items section and click Edit.
- Click Unlink.
Types of Rocks
Types of Rocks — Company, Departmental, Individual
The default Rock type is considered an individual Rock, in which one person is accountable for its completion. Teams can then choose to elevate a Rock's importance to the company or departmental level.
- Company Rocks: Set by the Leadership Team (LT) to drive organizational goals.
- Departmental Rocks: Prioritized Rocks at the team/department level.
- Individual Rocks: Assigned to a team member based on their role and responsibilities.

To mark a Rock as a Company or Departmental:
- Click Rocks from the left navigation.
- Click the Rock to open its details panel.
- Click the corresponding circle to mark the goal as a Company Rock or Departmental Rock.
Changes made to the Rock's details panel are saved automatically.
View a step-by-step tutorial
If you've shared a Rock with the leadership team or from the leadership team to additional teams, then it can be designated as both a Company Rock at the leadership team level and a Departmental Rock for other teams.
Making Rocks Smart
Making Rocks SMART
When building a Rock, be as detailed as possible to make expectations clear for completing the goal by the end of the quarter. We recommend adding Milestones and making the Rock SMART (Specific, Measurable, Achievable, Relevant, and Time-bound) whenever possible.
Making Rocks SMART — the SMART Goals Methodology
When creating Rocks, make them SMART. Feel free to copy and paste these questions below into any Rock's description.
Specific — What specifically will be achieved?
Measurable — How will the completion of this goal be measured?
Achievable — Is this goal achievable by this individual or team?
Relevant — How relevant is this goal to the company's overall vision?
Time-Bound — What are the key dates, and what is the final date for this goal?
Reminder: Team members can add additional details as Milestones to each Rock.
Copy and Paste Template
Copy and paste the table below to use as a template in your Rocks.
Milestones
A Milestone breaks a Rock down into smaller pieces with actionable due dates. Each Milestone can be delegated to an individual or worked on as a team. To enable Milestones for your account, go to Settings > Configuration.
To add Milestones to a Rock:
- Click Rocks from the left navigation.
- Select the arrow on the Rock to display milestones
- Click + Add Milestone.
- Add a title
- To edit the milestone, select it from the list
- Edit due date, and description.
- The due date could be the same as the Rock or earlier as an incremental step towards the larger goal.
- Edit due date, and description.
- Click Add.
Turning Milestones into To-Dos
It is essential to have an accurate due date for Milestones. Seven days before their due date, Milestones automatically become To-Dos unless they are already marked off as completed.
As a To-Do, the Milestone can receive a new due date and an update to its description. The To-Do defaults to one for the team, but it can be switched to a private To-Do with the on-screen toggle.
Our system keeps the To-Do and Milestone connected. So once the To-Do is completed, it will also be completed as a Milestone.
Editing Rocks
Editing Rocks
Occasionally, you may need to update a Rock's details to reflect changes in priorities, timelines, or responsibilities changes. This article provides step-by-step instructions on how to edit Rocks within Ninety, ensuring your goals remain accurate and aligned with your team's objectives.
How to Edit Rocks
To modify an existing Rock, follow these steps:
- Click Rocks from the left navigation.
- Locate the Rock you wish to edit and click on its row to open the details panel.
-
Use the details panel, to update various aspects of the Rock, including:
- Title: Modify the Rock's title to reflect its objective better.
- Due Date: Adjust the deadline to accommodate new timelines.
- Description: Revise the description to provide clearer guidance or additional information.
- Primary Team: Change the primary team responsible for the Rock if necessary.
- Additional Team Visibility: Add or remove teams that should have visibility into this Rock.
- Milestones: Add, edit, or remove Milestones to reflect the current progress plan.
- Attachments: Upload new files or delete outdated ones related to the Rock.
- Comments: Add comments to provide updates or communicate with team members.
Changes made to the Rock's details panel are saved automatically.
Best Practices for Editing Rocks
- Maintain Clarity: Ensure any updates to the Rock's title or description clearly convey the goal and expectations.
- Communicate Changes: Notify relevant team members of significant edits to keep everyone aligned.
- Review Regularly: Periodically reassess Rocks to confirm they remain relevant and adjust them as needed to reflect evolving priorities.
Creating and Using Milestones
Adding Milestones to Your Rocks
Milestones are integral to breaking down Rocks into manageable, actionable steps. They provide a clear roadmap toward achieving your quarterly goals by delineating specific tasks with due dates. This article outlines how to create and effectively use Milestones within Ninety to enhance productivity and ensure progress.
Enabling Milestones for Your Company
The ability to add Milestones to your Rocks is an optional setting at the account level. A user with Owner, Admin, or Coach permissions can turn on or off the Milestones feature by visiting Company Settings > Configuration > Rocks and clicking the Show Milestones on Rocks toggle.
Creating Milestones in Ninety
To add Milestones to a Rock:
- Click Rocks from the left navigation.
- Select the Rock to which you want to add Milestones to open its details panel, or click the caret on the Rock's row to open the Milestone dropdown.
- Click on + Add Milestone.
- Enter the Milestone's title and set a due date.
- Click Add or the checkmark to save the Milestone.
- Click on the created Milestone to edit its title, due date, and description or add an attachment or comment.
Who Can Own a Milestone?
Milestones can be assigned to any licensed team member in the organization.
Using Milestones to Track Progress
Milestones serve as checkpoints that guide the team toward completing a Rock. By setting specific due dates and assigning responsibilities, teams can monitor progress and address any obstacles promptly.
Automatic Conversion to To-Dos
To ensure timely completion, Milestones automatically convert into To-Dos seven days before their due date:
- Visibility: The Milestone appears in the team's To-Dos list, reminding the assigned individual of the upcoming task.
- Flexibility: As a To-Do, the Milestone can update its due date and description updated as necessary.
- Completion Tracking: Marking the To-Do as complete will also mark the corresponding Milestone as complete, maintaining consistency across the platform.
This is an optional company-wide feature that ensures critical steps toward completing a Rock are not overlooked. To enable automatic To-Dos for Milestones, a user with Owmer, Admin, or Coach permissions should visit Company Settings > Configuration > Rocks and click the Automatically create To-Dos for Milestones not completed 7 days before due date toggle.
Best Practices for Utilizing Milestones
- Sequence Milestones: Arrange Milestones in a logical order to create a clear path to Rock completion.
- Delegate Tasks: Assign Milestones to team members best suited for each task to promote efficiency and accountability.
- Regular Reviews: Discuss Milestone progress in weekly meetings to promptly identify and resolve any Issues promptly.
By incorporating Milestones into your Rocks, you transform ambitious quarterly goals into achievable tasks, fostering a structured approach to success.
Assigning and Reassigning Rocks
Assigning Rocks to Users
Rocks are 90-day goals that help teams progress toward their organization's long-term vision. Assigning these Rocks to the appropriate team members ensures accountability and clarity.
Assigning Rock Ownership
When you create a Rock in Ninety, assign an owner based on who on your team or from your organization is ultimately accountable for completing the goal. This person may not be responsible for completing all the work involved, but they are accountable for ensuring it gets completed.
When creating a Rock:
- Assigning an owner is a necessary requirement for creating a Rock.
- The list of possible owners is based on the Team filter.
- If you're using the Create button, you'll be the default owner of the Rock.
- In the Rocks tool, you can click + Add Rock on any team member's card to have that user be the new Rock's owner.
- Users with Observer-level permissions cannot be assigned Rocks.
Reassigning Rock Ownership
You can easily reassign a Rock's owner if responsibilities shift through its details card. Here's how:
- Click Rocks from the left navigation.
- Ensure the correct team is selected from the Team dropdown.
- Click the Rock whose owner needs to change.
- Click the profile icon on the top right of the details panel.
- Select a different user from the team.
User Roles and Permissions
All licensed users can reassign ownership of their team's Rocks.
Best Practices and Business Tips
- Clear Accountability: Assign Rocks to individuals with the capacity and resources to complete them.
- Regular Reviews: Review Rock assignments to ensure they align with team members' current responsibilities.
- Effective Communication: Communicate any reassignments promptly to all relevant Ideal Stakeholders to maintain transparency.
Sharing Rocks
Sharing Rocks Across Multiple Teams
You can share and display Rocks on multiple team pages to enhance collaboration and ensure alignment across different teams. When a Rock is shared with a team that its owner is not on, it is grouped into a section titled Shared Rocks. This feature ensures all relevant teams have visibility into inter-departmental Rocks, fostering transparency and accountability.

The Shared Rocks section is located at the bottom of the team's Rocks page. This is also where Rocks owned by team members who leave your team or company during the quarter are kept.
Sharing Rocks Across Multiple Teams

When creating or editing a Rock, you can assign it to multiple teams to ensure it appears on each team's Rocks page. Here's how:
- Click
 Rocks from the left navigation.
 - Click on a Rock to open its details panel, or create a new Rock with the Create button.
- Share the Rock with additional teams using the Other Teams dropdown.
- Click the checkbox to share the Rock with additional teams.
Changes made to the Rock's details panel are saved automatically.
View a step-by-step tutorial
Printing Rocks
Printing and Exporting Rocks to PDF
Printing your Rocks helps you maintain offline records, share progress with stakeholders, and analyze your goals outside the platform. This guide provides step-by-step instructions for generating and printing a PDF of your team's Rocks.

How to Export Rocks to a PDF
Follow these steps to download all Rocks displayed on your team's page as a PDF:
- Click Rocks from the left navigation.
- Use the Team dropdown to choose the relevant team.
- Click the ellipsis on the far right of the filters bar.
- Select Print to PDF from the dropdown.
- Choose the PDF's page orientation from the popup.
- Click Print.
To export a single Rock as a PDF:
- Right-click the Rock.
- Select Print to PDF from the dropdown.
How to Print the PDF
Once you have downloaded the PDF, follow these steps to print it:
- Open the file using a PDF viewer such as Adobe Acrobat, Preview (Mac), or a web browser.
- Go to file> Print or press Ctrl + P (Windows) / Cmd + P (Mac) to open the print dialog.
- Ensure the correct printer is selected.
- Choose the appropriate page size.
- Set orientation (Portrait/Landscape) based on the layout.
- Adjust margins and scaling if necessary for better readability.
- Click Print to complete the process.
Exporting Rocks
Exporting Rocks to a Spreadsheet
Exporting your Rocks from Ninety allows you to maintain offline records, share progress with stakeholders, and analyze your goals outside the platform. Follow the steps below to export your Rocks effectively.

Exporting Rocks to an XLSX File
To export one of your team's Rocks, including their Milestones, into an XLSX spreadsheet:
- Click Rocks from the left navigation.
- Select the appropriate Team using the dropdown.
- Click the ellipsis (…) on the far right of the filter bar.
- Select Download Excel from the dropdown.
- Save your file.
View step-by-step directions
The exported spreadsheet contains two tabs:
- Rocks: This tab includes columns for Owner, Title, Description, Due Date, Status, Level (Team or Company/Departmental), Team, Attachment Names, Completed On (Date), Link (to the item in Ninety), Created Date, and Archived Date.
- Milestones: This tab provides details such as Owner, Title, Description, Associated Rock’s Name, Due Date, Completed On (Date), and Link (to the item in Ninety).
Exporting Archived Rocks
To export archived Rocks, click the Archive toggle on before completing the above instructions.
Receiving Rocks Notifications
How to Receive Notifications for Rocks
You can easily set up notifications from Ninety to receive timely reminders about your Rocks and Milestones.
There are two primary forms of notifications:
- Daily summaries of your tasks, including upcoming and past due Rocks.
- Event notifications when you're set as the owner of an item or when someone comments on an item you own.
Setting Up Email Summaries

To receive daily email reminders:
- Click your name or profile icon and select Notifications from the popup.
- Click the Daily Emails tab.
- Check the box for each day you'd like to receive an email summary from us.
- Choose your preferred time to receive the email.
The daily email includes:
- Upcoming Rock and Milestone due dates
- Past due Rock and Milestone information
- A reminder to add Issues, Headlines, and To-Dos before your next meeting.
- A reminder to update KPIs.
Each user must configure their own email reminder settings.
Setting Up Event Notifications

To receive event notifications to your email:
- Click your name or profile icon and select Notifications from the popup.
- Toggle on your preferred options for receiving email notifications.
By configuring your notification preferences in Ninety, you can maintain awareness of your tasks and deadlines, fostering accountability and timely progress toward your goals.